Bread Lore
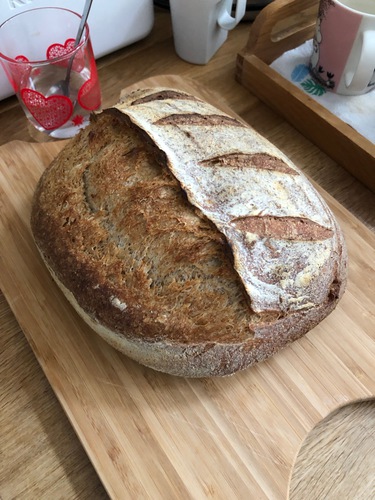  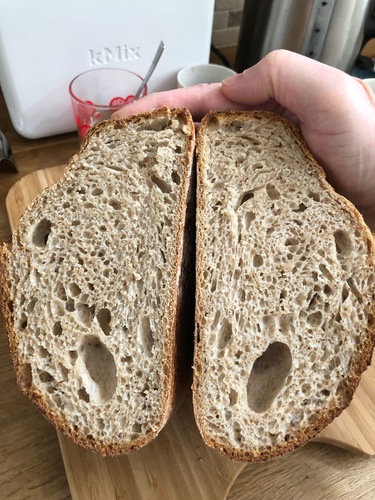 |
25% wholemeal loaf.
Contents:
- Schedule
- A loaf in two days
- Speeding up the process
- Sourdough starter
- Sourdough starter management
- Temperature
- Dough
- Baker's percentage
- Kneading
- Pushme-pullyu
- Slap and fold
- Stretch and fold
- No-knead
- Shaping
- Proving
- Baking
- A recipe
- Variations
A loaf in one day
As far as sourdough bread making is concerned, a loaf in a day is achievable, but it is a bit of a rushed job. A day means 12–16 hours from start to a baked loaf finish. Since it is best to let the loaf cool down before slicing, you are not likely to eat your creation on the same day, though you might! A more usual sourdough timeline is 24 hours to finished loaf.
Because a day is pushing it when using natural yeasts, you may need to encourage them along by providing a cosy setting to help speed up the process. This may also be required in winter if your kitchen/bread making area is on the cold side. One trick is to prove your dough in the oven itself with just the light on. The incandescent oven light bulb should generate enough heat to keep it at a nice temperature. You can also add an occasional bowl of boiling water to the oven to raise the temperature a little higher.
Schedule
This is the schedule I followed on this particular day. You can move the start time earlier or later to suit your own timetable.
- 0900(+0)hrs: Take your existing sourdough starter out of the fridge and give it a feed. You may also want to separate out a new starter at this stage. At the same time, in a separate bowl large enough to hold all the ingredients, mix the flour, water, and salt to begin the autolyse process, which helps with gluten development.
- 1300(+4)hrs: Your starter should now have doubled in size. If you haven't yet separated out a bit of starter for your next loaf, do so now. Take your dough and mix in the remainder of the starter, distributing evenly throughout the dough. Feel free to give the dough a quick knead at this stage too, which should also help to distribute the starter. Place the dough in a mixing bowl to help keep its shape during the rise (this can be lightly oiled to make it easier to take the dough back out) and cover to prevent moisture loss.
- 1400/1500/1600/1700(+5/6/7/8)hrs: This is the bulk rise or bulk fermentation stage. Whilst the dough is rising, every hour take it out and give it a quick knead/fold to help with gluten development. These days I just turn out the dough, and give a quick round fold, as suggested by Bake with Jack. You can do this up to four times, after which the dough will have been rising for 4 hours.
- 1800(+9)hrs: Lightly flour your worktop, and turn out your dough one last time. Gently shape it into a round, and let it relax on the worktop for 15–30 minutes. After the dough has relaxed, gently fold it into your desired shape (my favourite shape is the bâtard). (I sometimes skip the relaxing stage, and directly shape the dough.) Transfer your shaped dough to its final proving place (banneton/brotform, floured tea-towel lined bowl, etc.) smooth side down, and cover to prevent it losing too much moisture.
- 2100(+12)hrs: After proving for 3 hours, your dough should have risen, even if not quite doubled, and is now ready to bake! (You can shorten the proving time to 2 hours, which will give you a tighter crumb.) Place your cast iron pan and its lid in the oven, and set it to 240°C or as high as it will go. Warm the pan up for 30 minutes. Once the pan and oven are hot, take the pan out of the oven and remove the lid, taking care not to burn yourself, as the pan will be extremely hot! Turn out the dough onto a lightly floured surface, or a lightly floured piece of baking parchment, smooth side up, slice the top if desired, and settle into the hot pan (once again taking care not to burn yourself). Optionally spray some water into the hot pan, place the hot lid back onto the pot, and put back in the hot oven. Cook at the high heat for 15 minutes, after which remove the lid and reduce the temperature to 200°C for another 15 minutes, and finish off for another 15 minutes after that, adjusting the temperature if required should the loaf be colouring too fast (you don't want to burn it after all this effort!). This will result in a total baking time of 45 minutes.
- 2215(+13.25)hrs: Once the loaf is baked, remove from the oven and set aside to cool down for at least 30 minutes, and more like 1 hour, before slicing into it. Enjoy!
A loaf in two days
This is the more standard schedule for sourdough loaves, which follows the same steps as above but where the proving stage is moved into the fridge after the first 1–2 hours. This slows down the yeast activity "retarding" the rise of the dough. The dough can be left to prove in the fridge for 8–16 hours.
Baking is done the next day. The dough can be used straight from the fridge, there being no need to bring it back to room temperature first. Pre-warm the oven and cooking pot, take out the dough from the fridge, slice if desired and bake as directed above.
Speeding up the process
As you can see, baking a home-made sourdough loaf can take its sweet time, even though most of this time is just waiting around for things to happen, and not active hands on time.
There are a few ways this process can be sped up (though, admittedly, not by much), and, though I wouldn't recommend them, here they are for those days where you just need a loaf in a hurry:
- Temperature: if you increase the ambient temperature of the dough environment, it will rise quicker, allowing you to get to the baking stage sooner. Don't forget about gluten development, though, so adjust everything accordingly.
- Initial yeast content: another way to speed things up is to make a larger starter mix to add to your dough. So, rather than using my suggested amount of flour in the starter, double or triple it, then use in the recipe as indicated (don't forget to keep some back for you next starter!). The higher starter, that is yeast, ratio in the dough will result in a quicker rise.
Bear in mind that some of the joy of sourdough bread is the actual sourness! (Not that it is actually that sour…if you're doing things right!) This is why many home bakers prefer the slow overnight fridge rise, as this allows time for the flavours to develop in the dough. As ever, try the different methods with or without retarding and see which you prefer!
Sourdough starter
You can make your own sourdough starter from nothing but flour, water, and a bit of air. I did try this once, but ended up throwing it away as I found it too acidic. Now I know that it probably just needed some more feeding, and maybe a change of diet, to increase the ratio of wild yeast to acetic acid bacteria. If you'd like to create your own sourdough starter, you'll find plenty of suggestions online.
Sourdough starter management
As for sourdough starter management the key that has allowed me to finally keep one going for over 6 months is to ignore the quantities that most books expound, which ranges between 150–250 grams of flour every feed, and pare this down to 16g of flour. This time my starter came from a local bakery that was offering some for free with online orders.
In order to feed the starter use a 1–2–2 ratio of starter-flour-water. This means 8g of starter, 16g of flour (I use a 50/50 mix of white and wholemeal), and 16g of water. You can use the leftover starter to make pancakes, crumpets, waffles, … or just put it in the food waste bin. Mix the starter ingredients in a clean jam jar, and make sure they are all well mixed with no dry flour bits left behind. The mix should be of a paste like consistency, not too runny, otherwise the resulting air bubbles from the yeast action will not hold their shape.
Once the starter has been fed let it double in size. (One trick to make it easier to determine whether a starter has doubled is to use an elastic band around the jar marking the starting point of the starter.) At this point you have a fully active starter. This can be put in the fridge and can be used as is for up to 2 weeks. After that it will probably need reviving before it can be used in a dough. To revive a starter simply follow the same steps as for feeding. A fully active starter should double in size in roughly 4 hours, at an ambient temperature of around 21°C. If yours is a little sluggish, just go through another feed cycle until it is fully active.
If you are starting from a neglected starter, one you may have left in the fridge for over a month, for example, you may want to change the ratio to 2–2–2 of starter-flour-water for the first feed.
Once you are happy with your starter management and are certain you can revive a neglected starter you can start experimenting with different feed ratios and/or different flours. Some other common ratios are 1–5–5, 1–10–10, 1–50–50 and even 1–100–100. Rye flour is popular for starter feeds, so be sure to give it a go and see how it works for you. Don't forget to keep a backup batch of your active starter in the freezer, just in case something doesn't quite to go plan with your experiments. You can always refresh your freezer backup from itself, should you need to resort to it. Don't forget to revive your frozen starter first. Once its lively use as per normal (and don't forget to make another backup!).
Temperature
Bear in mind that yeast action is a biochemical process and therefore temperature can be seen as just one more ingredient to add to the mix. The colder the ambient temperature the slower the yeast action and therefore the slower the dough will rise. The higher the ambient temperature the quicker the yeast action and the quicker the rise.
Dough
To make bread make sure you are using strong bread flour, not just any old plain flour. Bread can be made with standard plain flour, but bread flour has a higher percentage of protein that makes the bread hold more of the carbon dioxide gas produced by the yeast action, therefore producing an airier loaf. Plain flour will produce a denser loaf.
For no-knead breads the hydration content of the dough, i.e. the baker's percentage of water in the dough, must be at least 65%. The wetter the dough the easier it is for the yeast to help establish the gluten network in the dough.
One thing that can help make your dough more malleable is to add an autolyse step to your process (this is already listed in my schedule above). Autolyse is simply mixing the flour with the water ahead of adding the leavener. This hydrates the flour activating the enzymes contained therein which begin working on the gluten development. This can make for a stretchier and easier to handle dough, and can reduce bulk fermentation times.
Baker's percentage
Baker's percentage is a way to easily scale bread recipes up or down. This is done by assuming that the flour weight in a recipe is always 100% and working out the weight of the remaining ingredients based on that.
For more information see the following links:
- https://www.kingarthurbaking.com/pro/reference/bakers-percentage
- https://www.theperfectloaf.com/reference/introduction-to-bakers-percentages/
Kneading
Kneading helps develop the gluten in the flour. Here are the main techniques I have found for kneading your dough. Choose the one you like best, and don't forget to try one of the other techniques once in a while.
Pushme-pullyu
(Not actually called this, but it is…) The traditional kneading method.
Slap and fold
Also known as the French fold. See https://www.theperfectloaf.com/guides/slap-and-fold/.
Stretch and fold
No-knead
In a sufficiently hydrated dough, the yeast will do all the kneading for you, and there is no need to knead. Practice this technique with Jim Lahey's recipe, which is the basis of all my loaves, whether kneaded or not.
Shaping
It is only recently that I have come to understand the reason for "shaping" the dough. The shaping stage creates tension in the outer skin of the dough helping it hold its shape. This is what prevents it from oozing out into a flat pancake all the time, and is what gives you nice tall loaves when not using a bread tin. When there is not sufficient surface tension in the dough it will tend towards the flatter side, though it will still taste great!
There are plenty of tutorials for dough shaping online, so go and take a look! My favourite shape is the bâtard, which is a stumpy oblong loaf.
Proving
Proving is the last rise of the shaped dough. It is called proving as the fact that the dough rises is the "proof" that the yeasts are still alive and doing their thing in order to get you that perfect airy loaf.
Baking
When baking your dough, after all those hours of work and gentle care, you want the best environment for your dough to turn into that perfect loaf. For this to happen, you need steam in your oven. The reason is that the outer crust of your loaf is going to harden when in contact with the high heat of your oven. If it hardens too quickly it will act like a straight-jacket stopping your loaf from being able to expand, and you will end up with a flatter loaf and a tighter crumb. Steam slows down the hardening of the outer crust allowing the dough to expand experiencing a full oven spring resulting in that lovely airy feel so sought after in a sourdough loaf.
The best way to get steam into your home oven for baking is to use a cast iron or heavy enamelled pot with a lid (a Le Creuset or similar). This will allow the moisture that is naturally present in your dough to turn into the steam that is necessary for the bread to rise. You can add additional moisture to the pot when placing the dough inside just before baking, but this is not necessary.
Bread can take very high temperatures when baking and an initial hit of very high heat helps with the "oven spring", which is the rise in the oven due to the expansion of all of those trapped air pockets in the dough when in contact with heat. In my example schedule above I have gone for a high heat setting. I find that sometimes this produces a somewhat thick outer crust. Though a thick crust is an authentic finish for a sourdough loaf, some people can have trouble chewing this, so I also use a lower temperature bake resulting in a thinner crust as follows:
Breaking the baking stage down into three 15 minutes stages allows the baker to check on the bread a number of times during baking in order to make any required adjustments depending on how the bread is colouring, etc.
A recipe
This is the base recipe I use for all my loaves, and it comes from Jim Lahey's no-knead recipe mentioned above:
| Baker's % | Weight | Ingredient |
|---|---|---|
| 100% | 400g | Flour |
| 75% | 300g | Water |
| 2% | 8g | Salt |
| 0.25% | 1g | Instant yeast |
When using the above recipe for sourdough I replace the 1g instant yeast with whatever amount of active sourdough starter I have to hand (remembering to hold some back to keep my starter going).
Variations
The variations are based on the recipe above. Ones I use regularly are:
- Instead of using 100% white bread flour, swap this out for 50% white + 50% wholemeal flour, i.e. 200g white bread flour + 200g wholemeal flour, for a total 400g of flour (as above).
- Replace 25% of the flour, i.e. 100g (leaving you with 300g of white flour) with one of:
- Wholemeal flour.
- Rye flour (note that rye flour makes the dough much stickier, and therefore trickier to work with. I'd recommend you only try this variation once you are comfortable working with dough).
- Try the 25% rye flour version with the addition of 50g raisins + 50g walnut pieces. In order to make kneading easier, add the raisins and walnuts after the first fold of the dough: fold the dough, then gently press it down against the work surface turning into a flatish square. Distribute the walnuts and raisins evenly throughout the dough, and give it another fold/knead to further distribute them. Shape into a round and return to its container to continue the bulk rise.